
Copilot Connector (Legacy)
This guide connects Microsoft Copilot to the Flowcase REST API through a Power Apps custom connector. For new set-ups we recommend the Flowcase MCP server instead. It is easier to set up and works with Copilot, Claude and other MCP clients. See Microsoft Copilot Studio for the steps. The MCP server is in beta and is available on request.
This guide sets up a Power Apps custom connector to the Flowcase CV search, then adds it to Copilot Studio as an action, so Copilot can find people by their CVs.
Prerequisites
Before you start, make sure you have:
- A Flowcase account
- A Flowcase API key. See Authentication & Security for how to create one.
- Access to Microsoft Power Apps
- Access to Copilot Studio
Set up the Power Apps connector
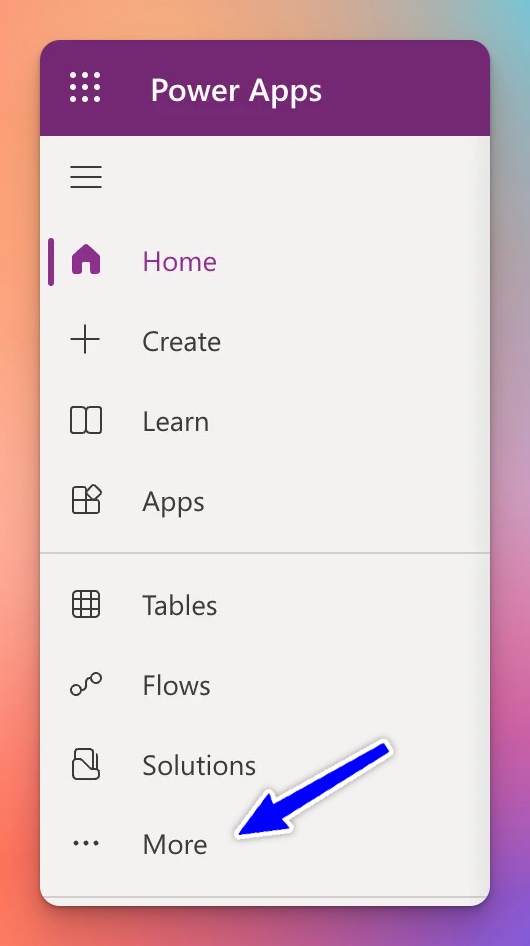
Go to make.powerapps.com and click More to see all the data integration options.
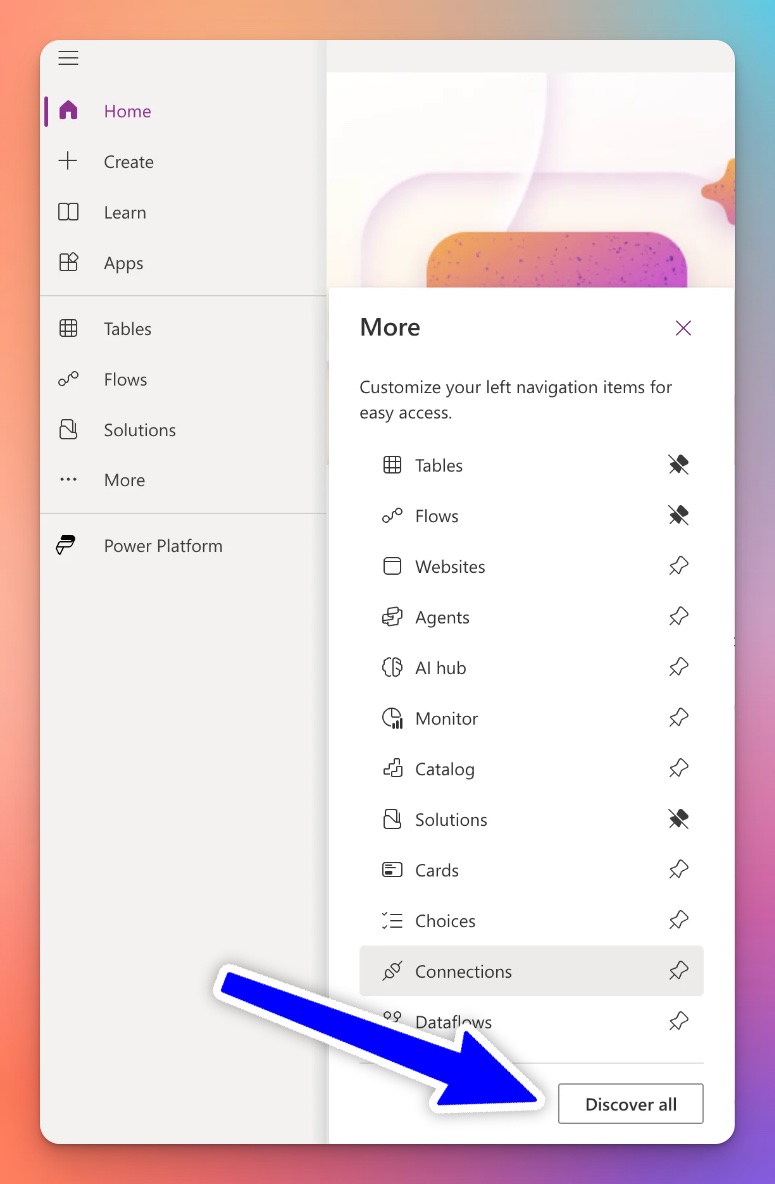
Click Discover all.
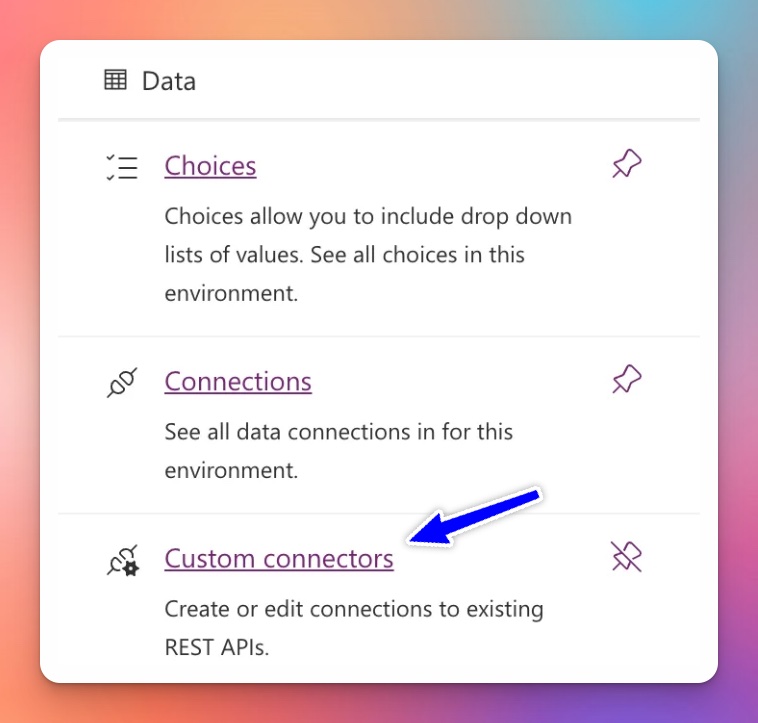
Under Data, select Custom connectors. Pin it to the left-hand menu so it is easy to find later.
Create the connector
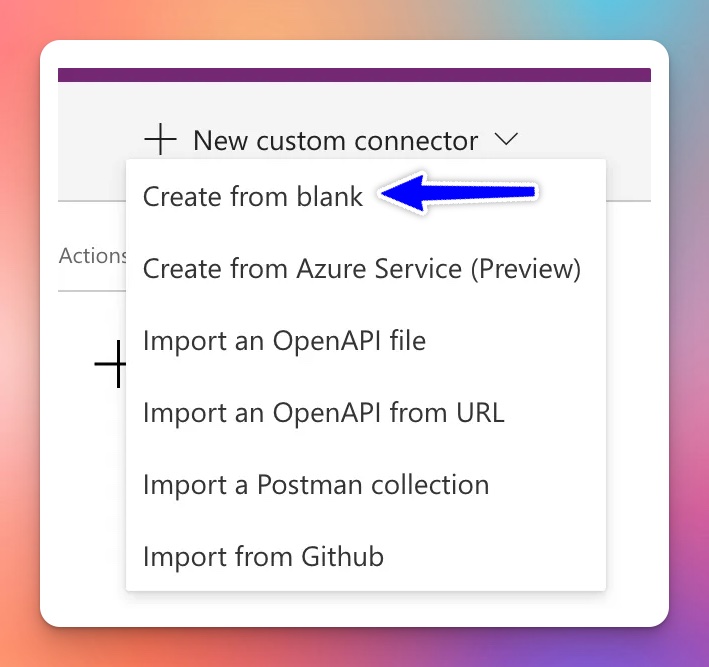
Click New custom connector in the top right corner and choose Create from blank.
Give the connector a name. "Flowcase" works, but choose something more descriptive if you plan to create more than one connector.
Define the connector
Turn on the Swagger editor toggle and paste in the following definition. Replace <subdomain> with the subdomain you use to access Flowcase.
swagger: '2.0'
info:
  title: Flowcase
  description: Flowcase search for users by query
  version: '1.0'
host: <subdomain>.flowcase.com
basePath: /
schemes:
  - https
consumes:
  - application/json
produces:
  - application/json
paths:
  /api/v4/search:
    post:
      responses:
        default:
          description: default
          schema:
            type: object
            properties:
              cvs:
                type: array
                items:
                  type: object
                  properties:
                    name:
                      type: string
                      description: name
                    email:
                      type: string
                      description: email
                    url:
                      type: string
                      description: url
                    results:
                      type: array
                      items: {}
                      description: results
                    title:
                      type: string
                      description: title
                description: cvs
      summary: Search for users in flowcase
      description: Search for users in flowcase
      operationId: freetext_search
      parameters:
        - name: body
          in: body
          required: true
          schema:
            type: object
            properties:
              size:
                type: integer
                default: 30
              must:
                type: array
                items:
                  type: object
                  properties:
                    query:
                      type: object
                      properties:
                        value:
                          type: string
                          description: Query value
                      required:
                        - value
      x-ms-openai-data:
        openai-enabled: false
        operations:
          - operationId: freetext_search
            x-ms-require-user-confirmation: true
definitions: {}
parameters: {}
responses:
  default:
    description: default
    schema:
      type: object
      properties:
        cvs:
          type: array
          items:
            type: object
            properties:
              cv:
                type: object
                properties:
                  title:
                    type: string
                    description: title
                  email:
                    type: string
                    description: email
                  name:
                    type: string
                    description: name
                description: cv
              preview_url:
                type: string
                description: preview_url
              highlight:
                type: string
                description: highlight
          description: cvs
        total:
          type: integer
          format: int32
          description: total
securityDefinitions:
  api_key:
    type: apiKey
    in: header
    name: Authorization
security:
  - api_key: []
tags: []
Trim the response (optional)
If you skip this step, the answers the LLM generates may soon exceed its context limit. You may not need it if you plan to show results as cards rather than have the LLM answer from them.
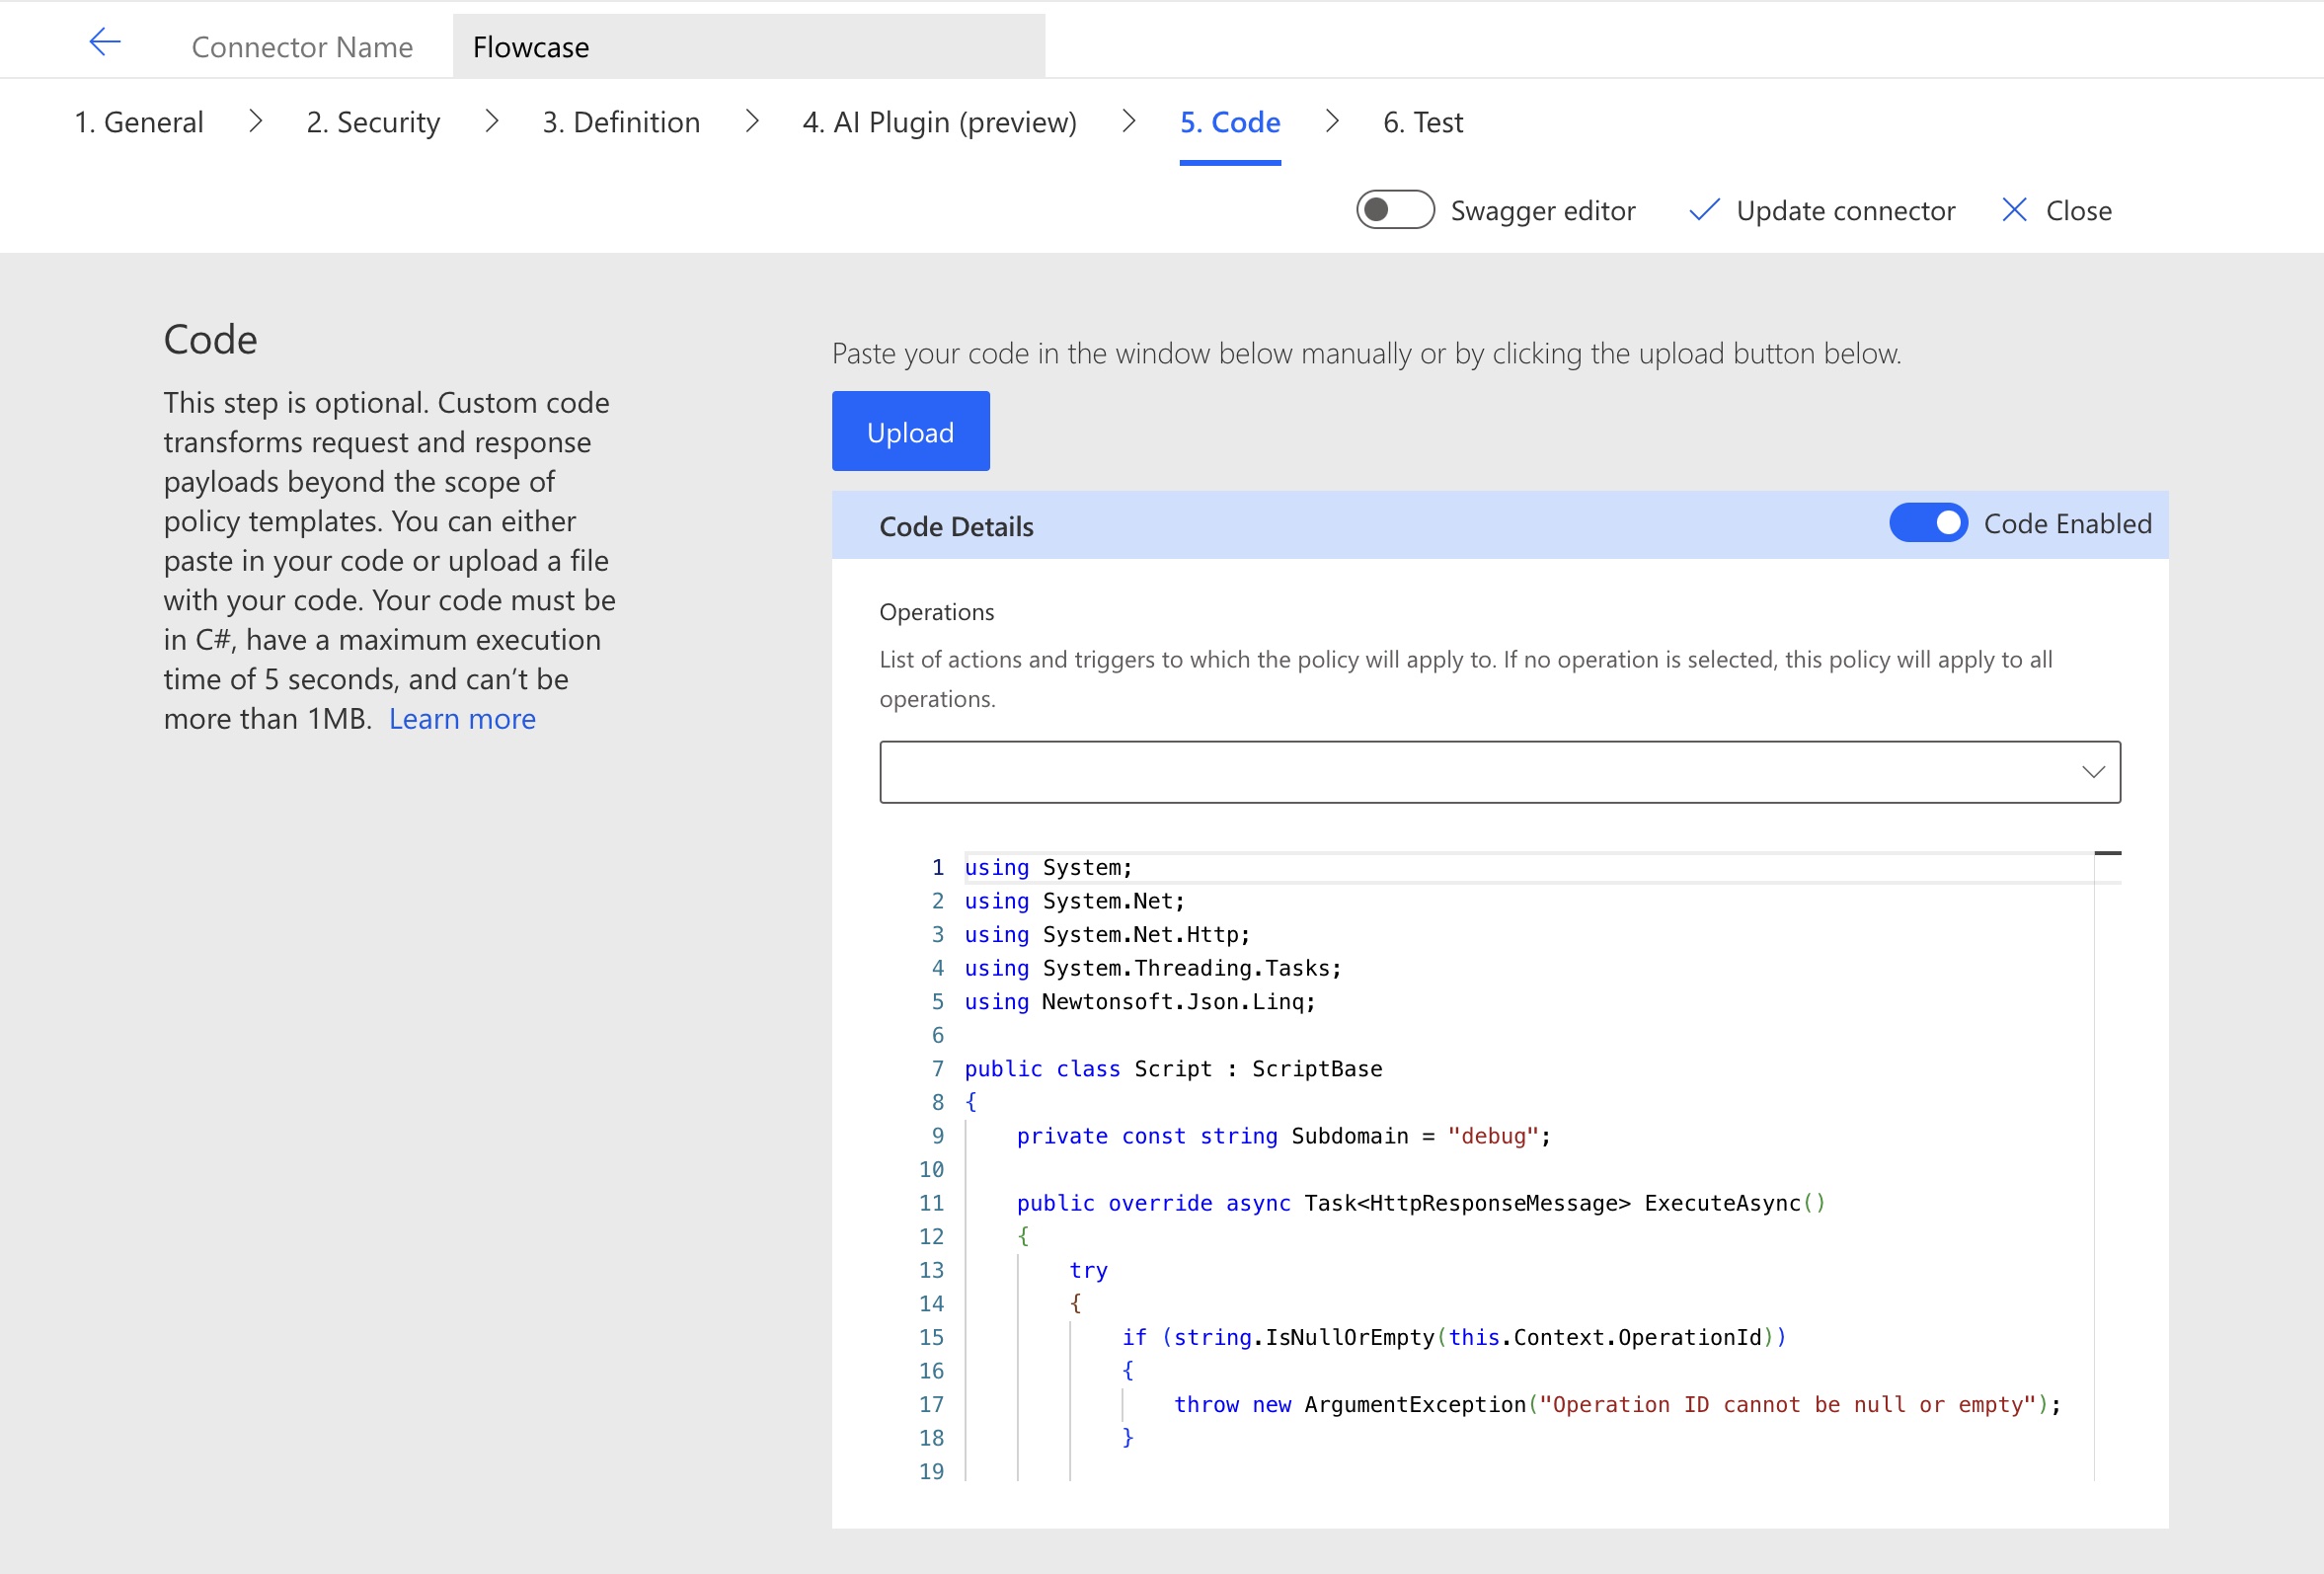
On the Code tab you can add custom code that filters the JSON Flowcase returns down to the data you need. See Search for CVs for the structure of the response, and Microsoft's guide to writing code in a custom connector.
Test the connector
Click New connection and enter your API key in the form Bearer <your-api-key>.
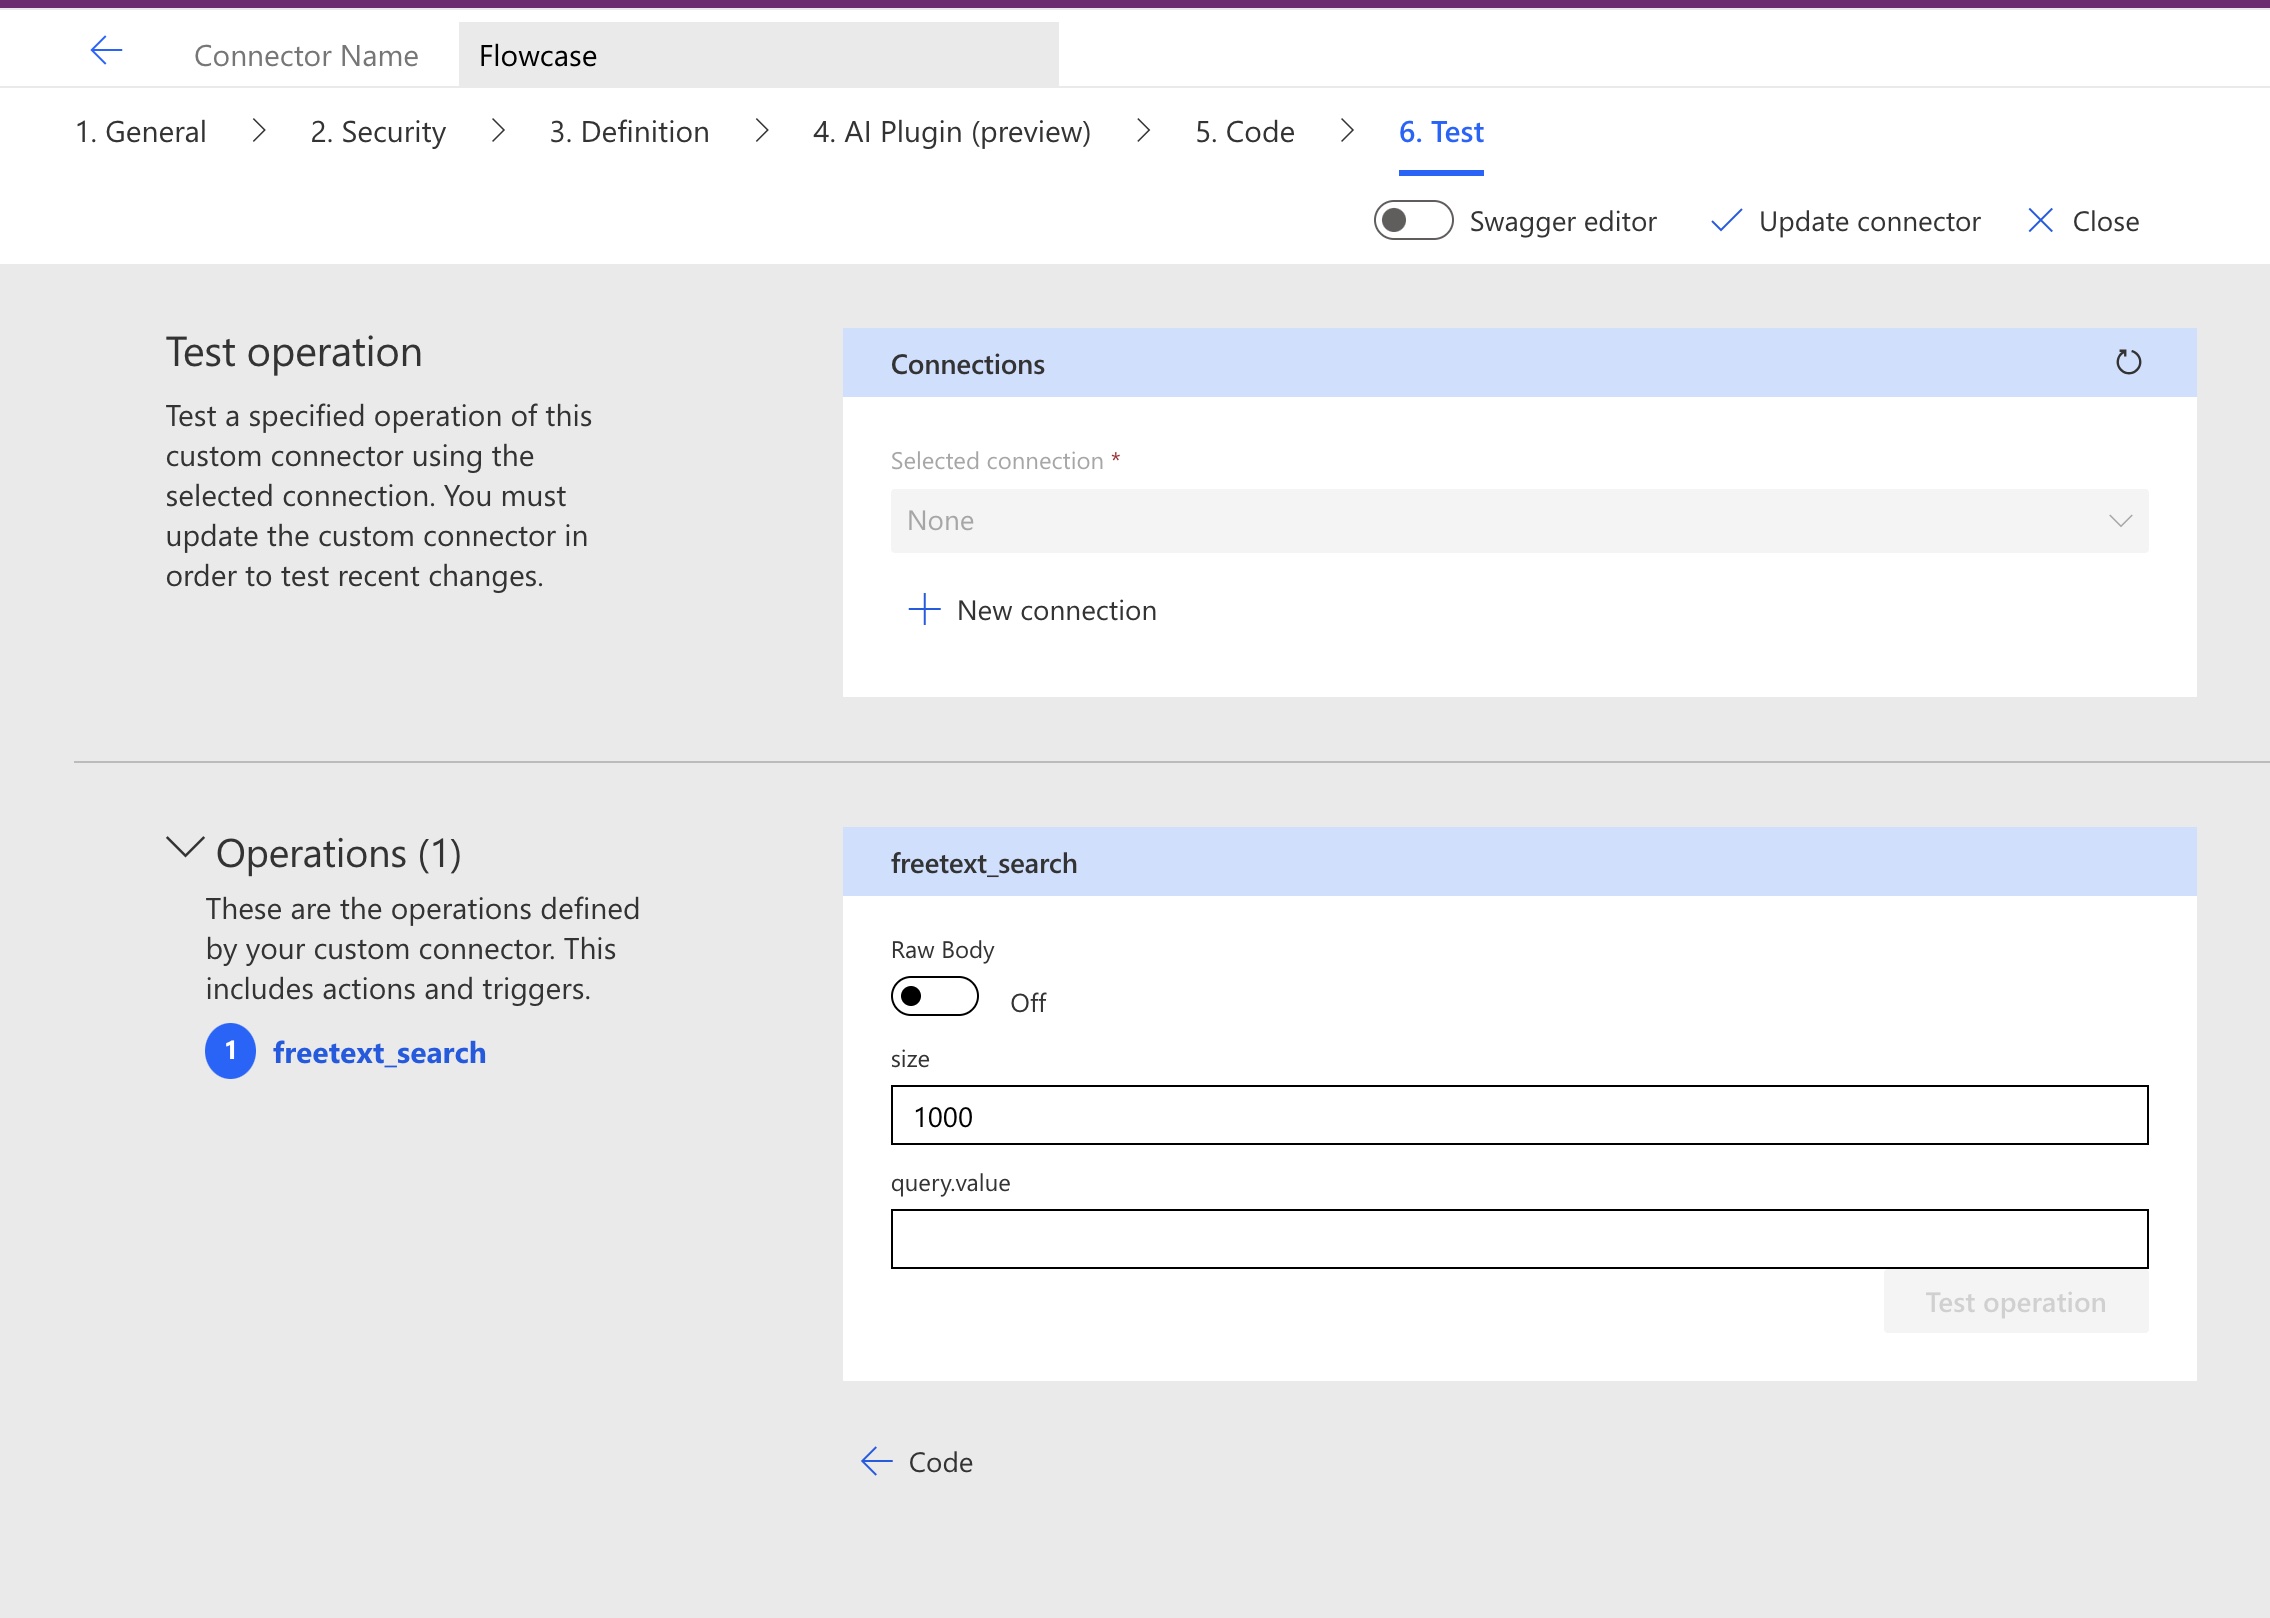
Once the connection is created, Power Apps takes you to your connections. To test the connector, go back to Custom connectors, open the connector's Test tab, select the connection, enter a search term in query.value and click Test operation.
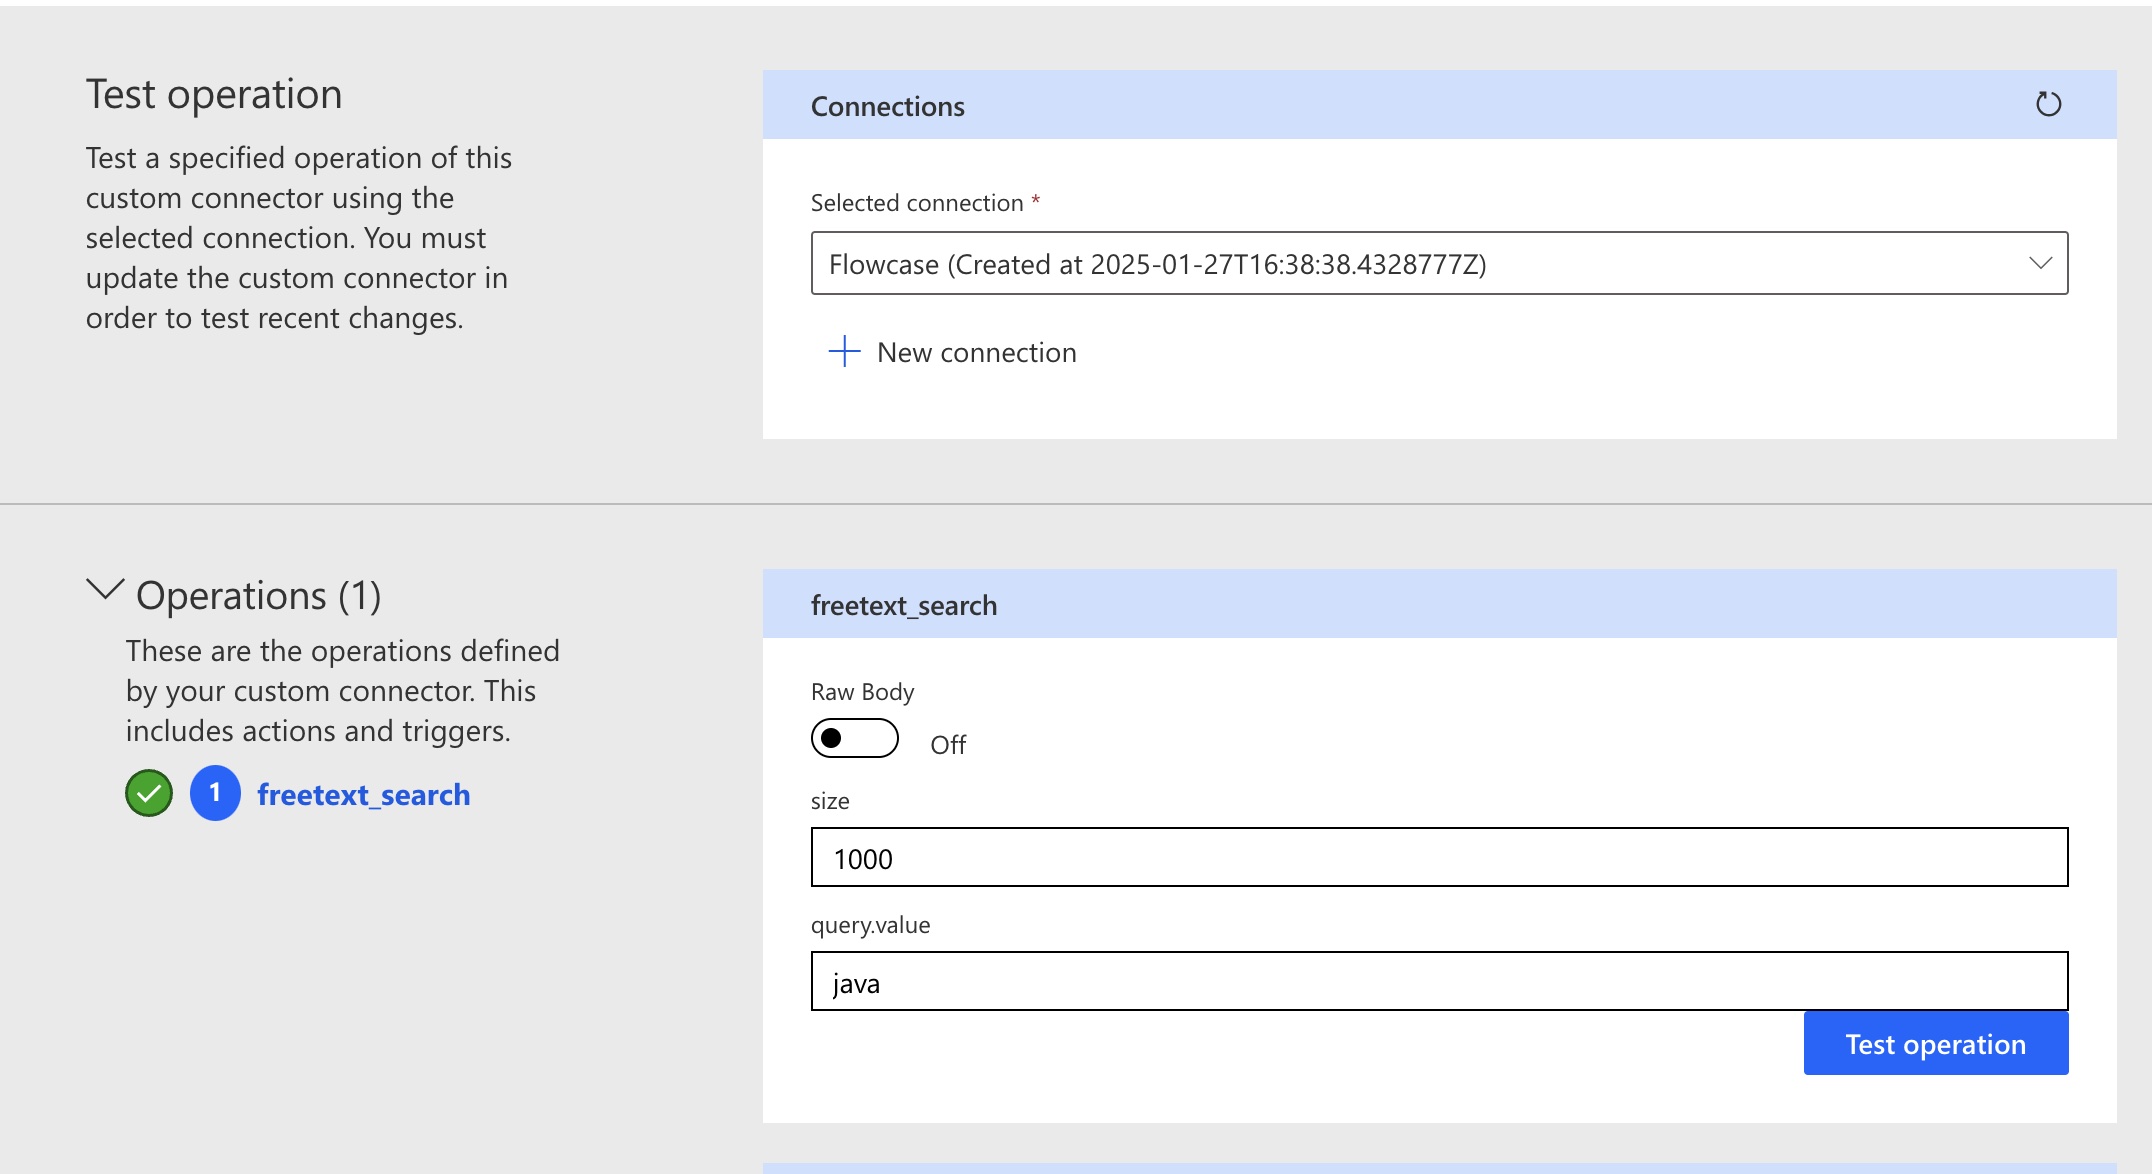
If the test returns JSON with CVs, the connector works.
Add the connector to Copilot Studio
In Copilot Studio, open your agent or the main Microsoft 365 Copilot. Go to the Actions page and click Add an action.

Search for the name of your connector and select it from the results.
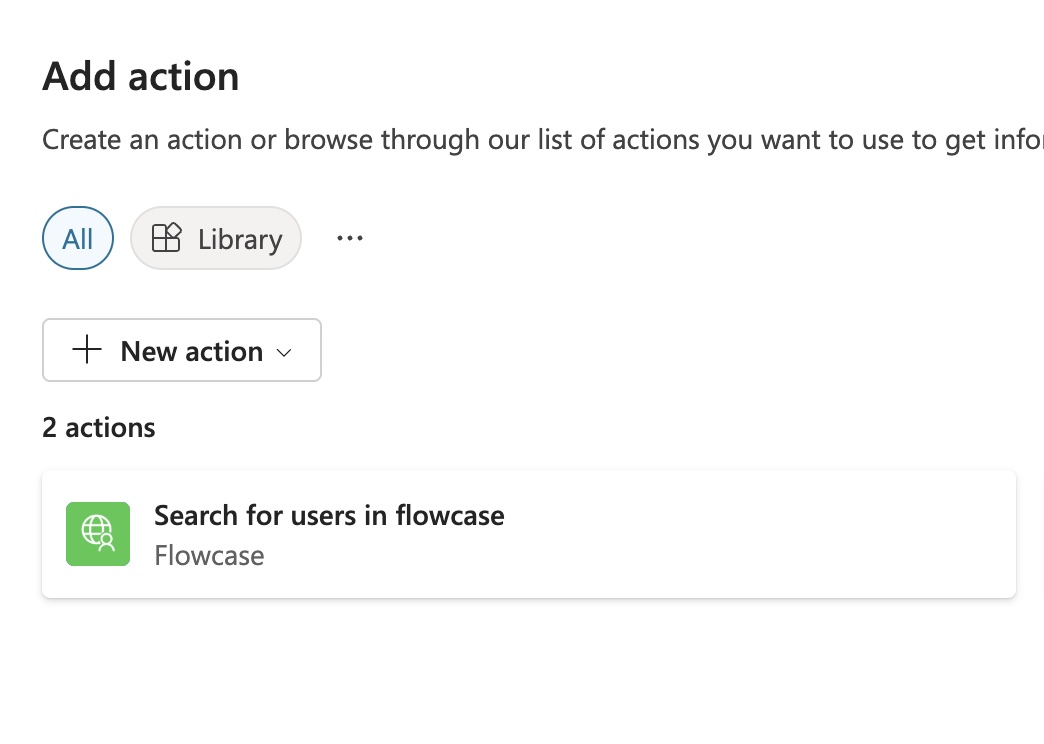
If you tested the connector earlier, its connection is already available under the three dots on the right. If not, create one with your API key in the form
Bearer <your-api-key>.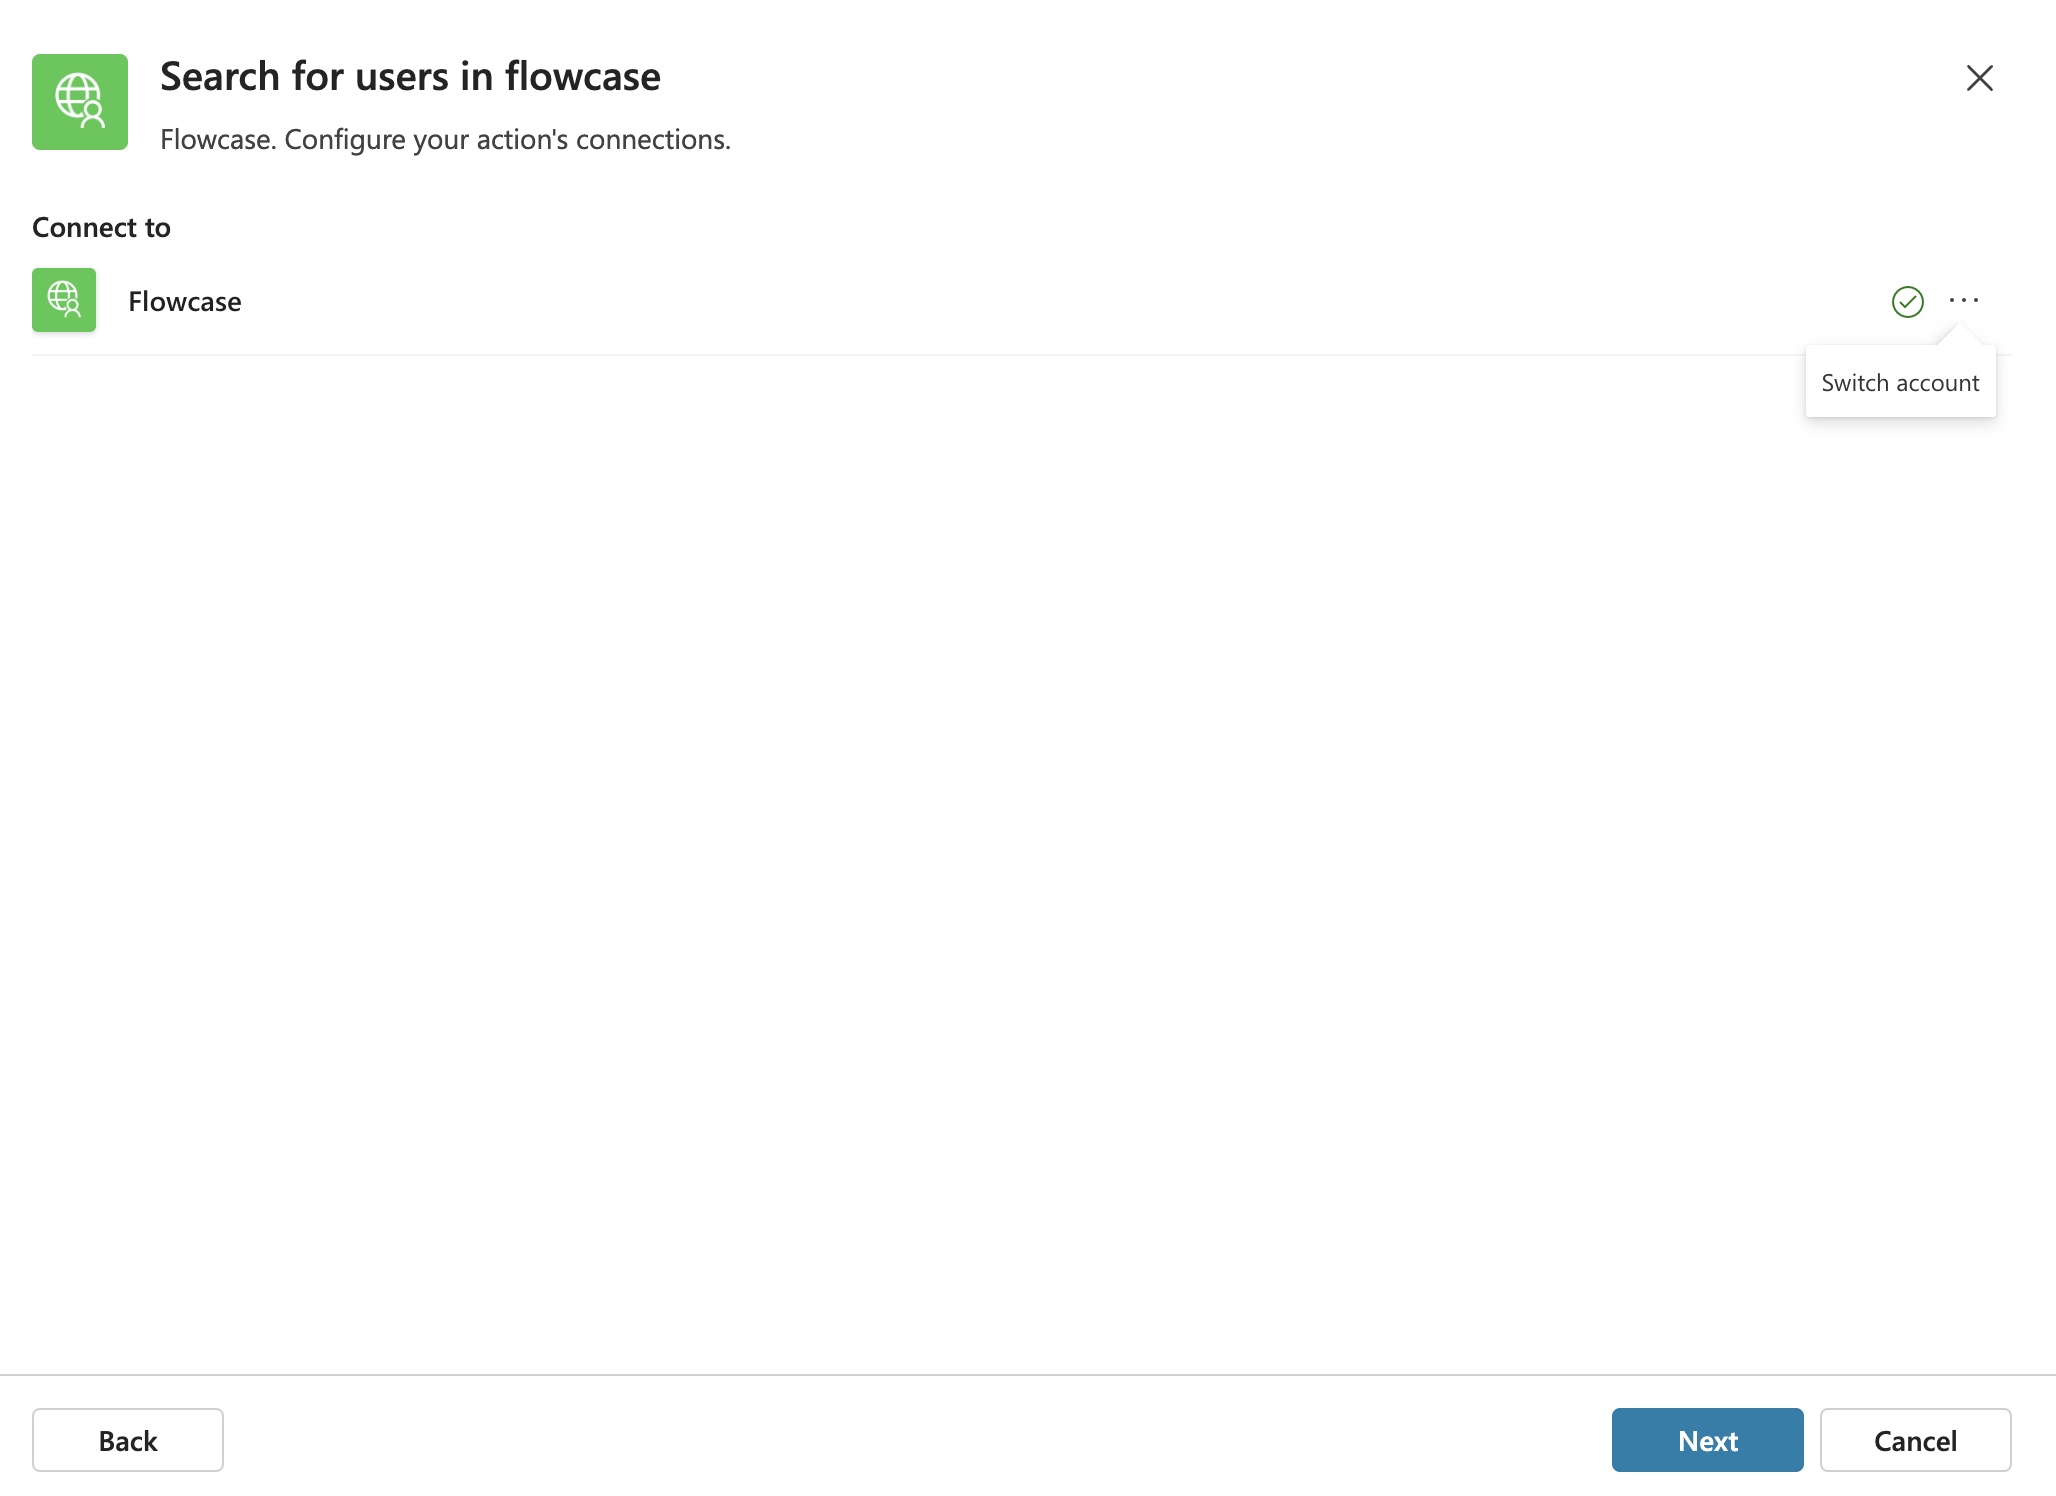
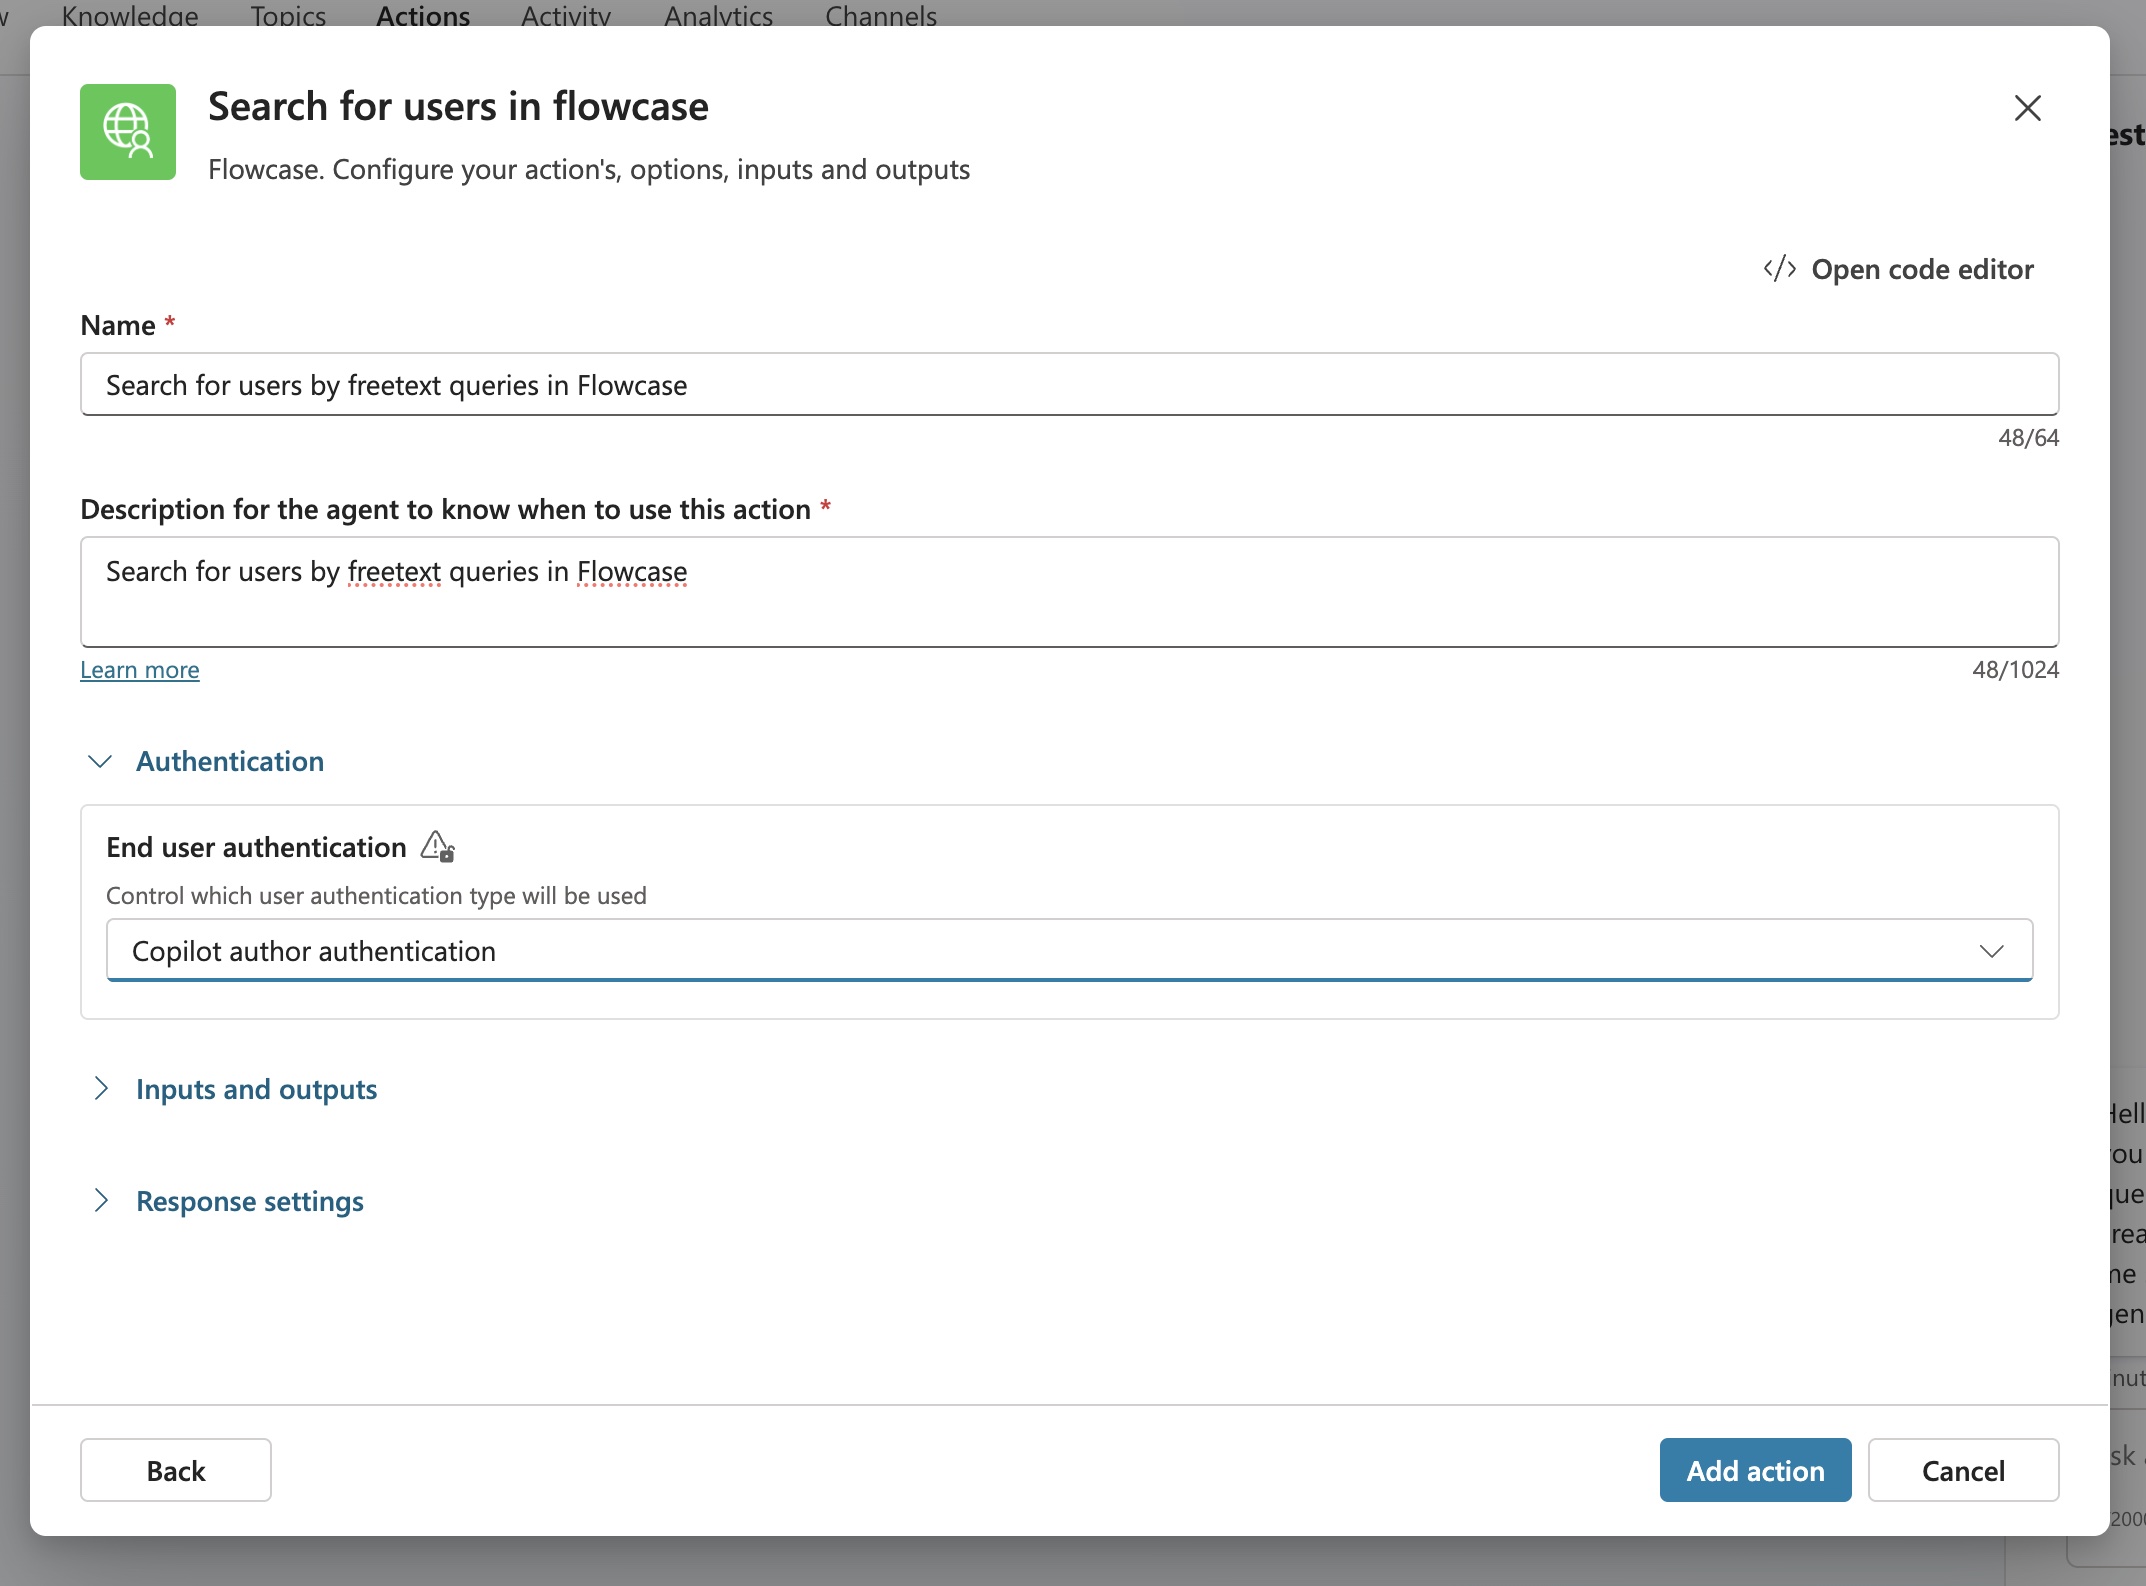
Under Authentication, choose whether the action uses your connection for everyone or each Copilot user's own.
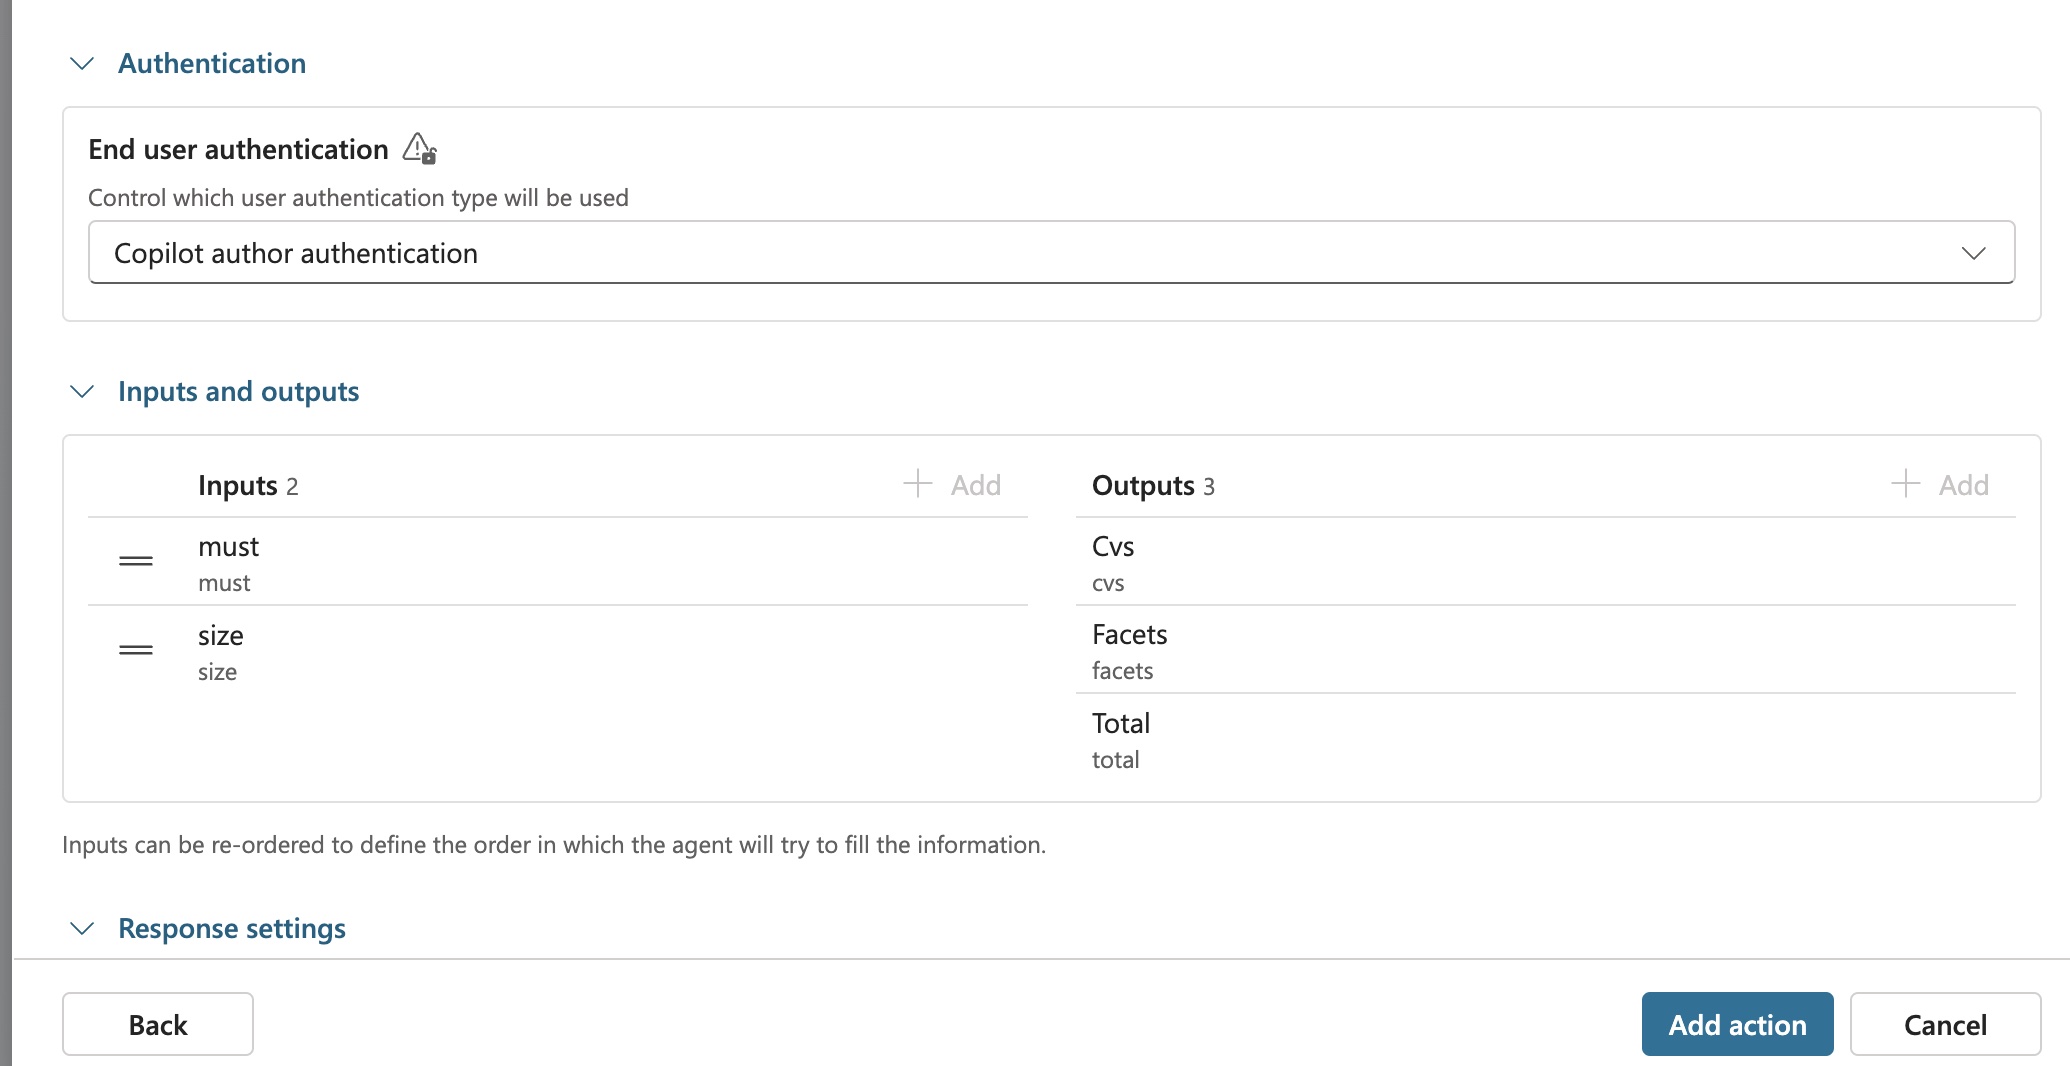
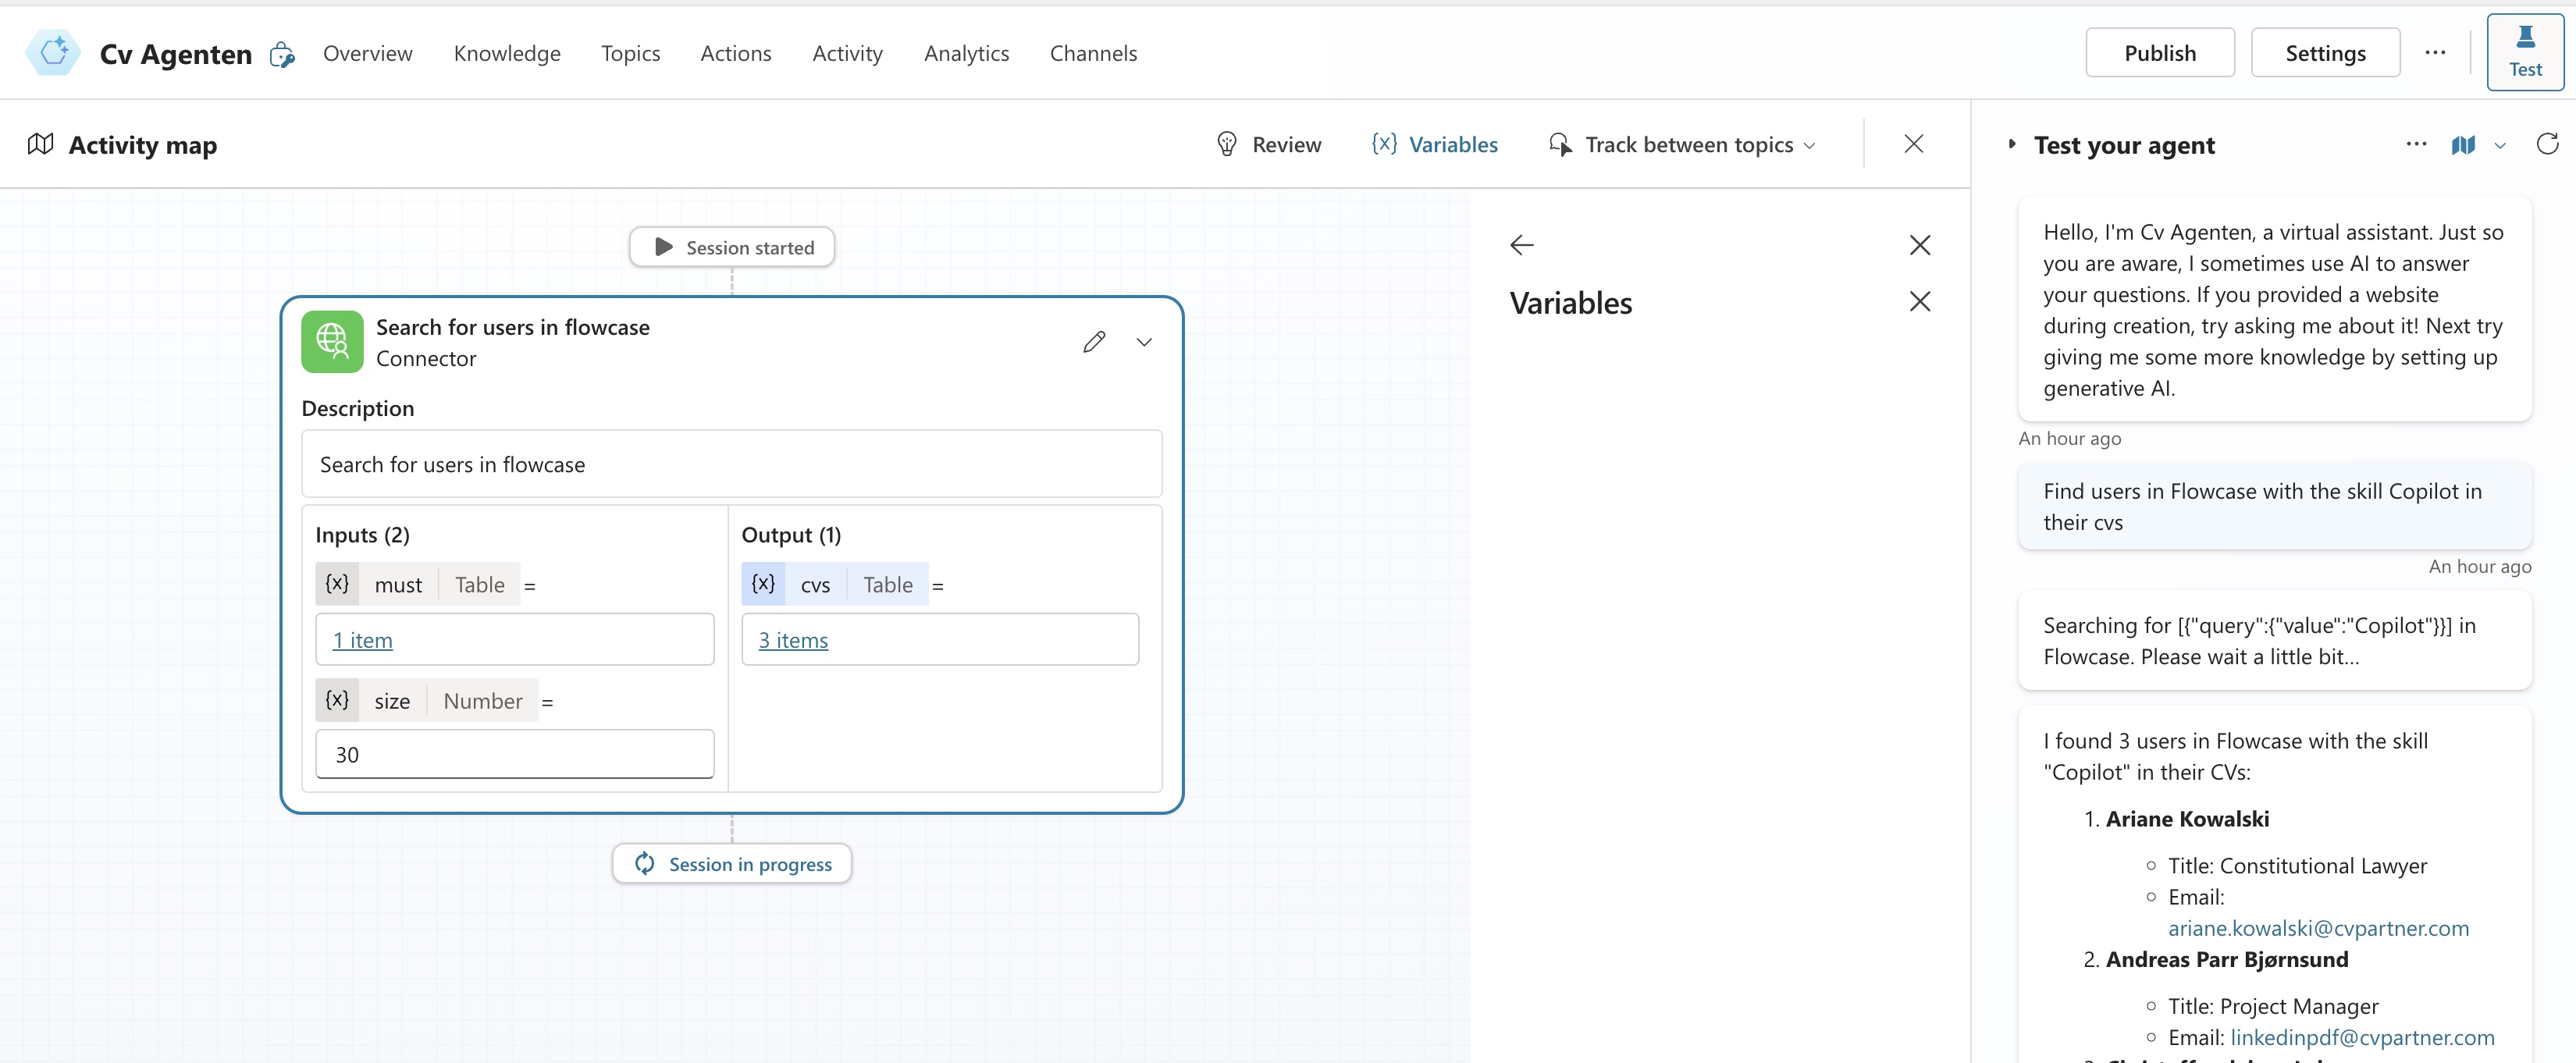
Under Inputs and outputs, set the
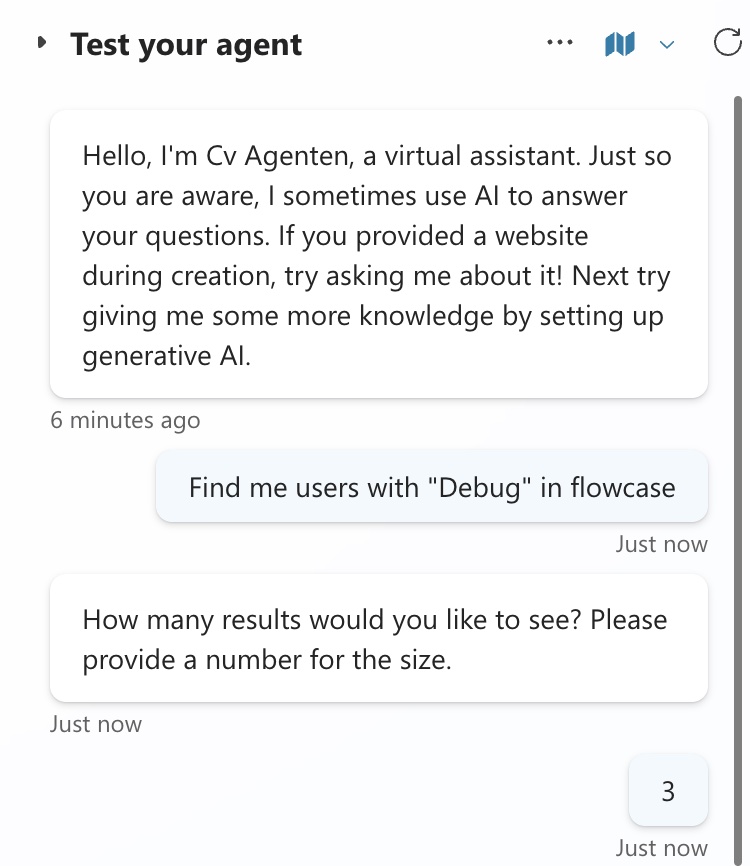
mustinput to dynamic, so the LLM decides what to search for. You can setsizeto a fixed value or let the agent fill it in for each request.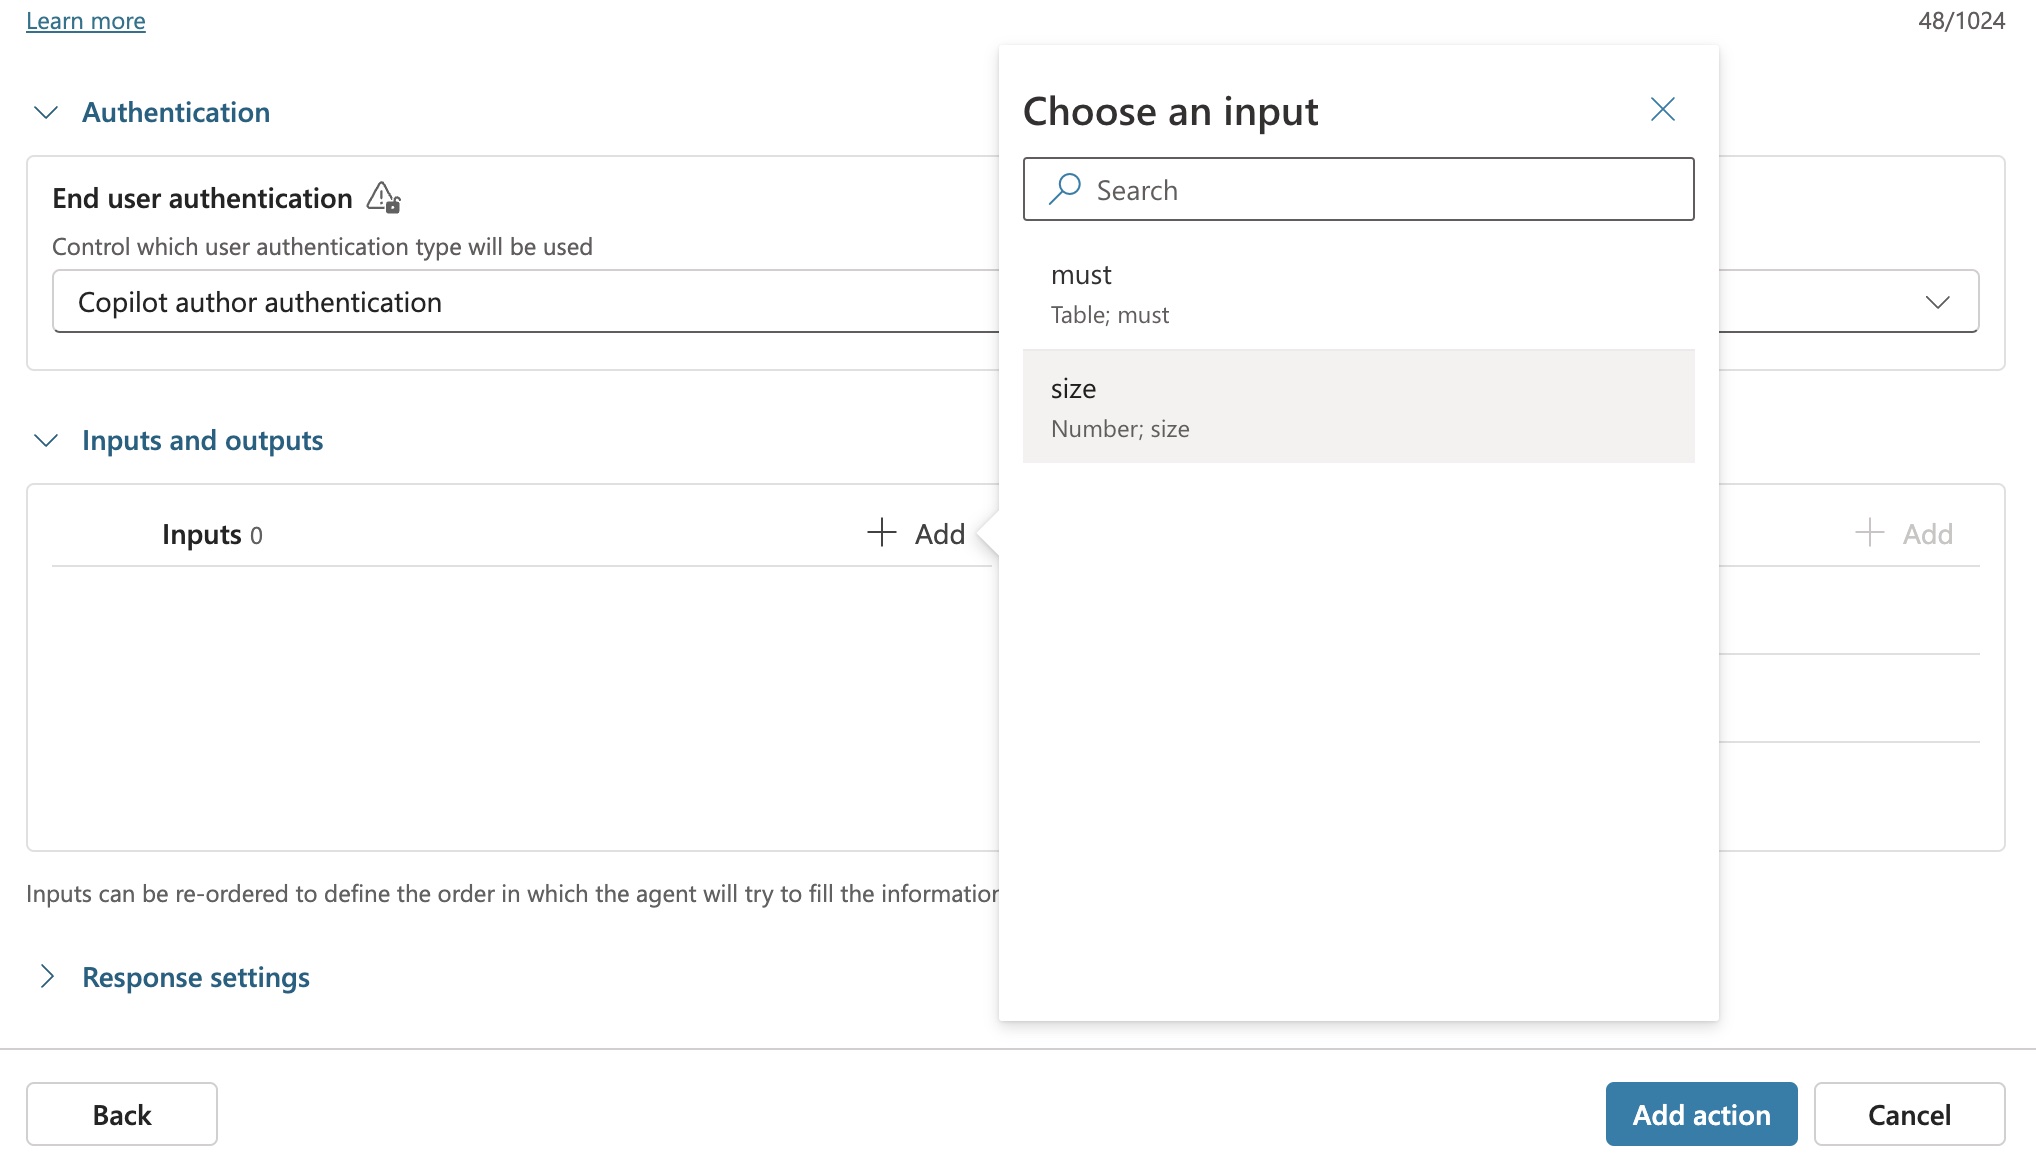
Click Add action to finish.
Test the action in the panel on the right.
Next steps
You can change the connector to control which Flowcase data your agent can use. For questions or feedback about this guide, or to show us what you have built, contact techsupport@flowcase.com.